Deploy to AWS Amplify
This guide covers how to deploy Composable UI to AWS Amplify.
Prerequisites
- You'll need an AWS account, sign up here: https://aws.amazon.com/
- You'll need to fork the Composable UI github repository.
- This is required since later on you'll be authorizing AWS Amplify access to your forked copy of Composable UI.
Create a new AWS Amplify app
- Sign into your AWS console
- Go to the AWS Amplify service. It can be found by searching for "AWS Amplify" in the search bar.
- Once in the AWS Amplify dashboard, click on
Create new app. Follow the steps below to configure the new app.
Configure the new app
Source Code setup
- Select
GitHubas the Git provider, and clickNext. - Select your Composable UI repository from the
Select a repositorysearch bar.- Note: You may need to click on the
Update GitHub permissionsbutton to authorize AWS access to your desired github organization and specific github repository.
- Note: You may need to click on the
- In
Select a branch, selectmain. - Select the
My app is a monorepocheckbox. - Set the
Monorepo root directorytocomposable-ui. - Click
Next
App settings
On the App settings screen:
- Set the desired
App namefor your Composable UI deployment. - The build settings are automatically detected from the
amplify.ymlfile. - The Environment Variables are configured in the
Advanced Settingssection. We will skip this for now, and come back to this in a later step. - Click
Next.
The Composable UI repository contains an amplify.yml file, which provides AWS Amplify with the necessary build configuration to successfully build and deploy Composable UI. Refer to Understanding the build specification to learn more about configuring the build.
Review
On the Review screen, click Save and deploy.
The deployment will succeed, however, we now need to setup the Environment Variables.
Configure Environment Variables
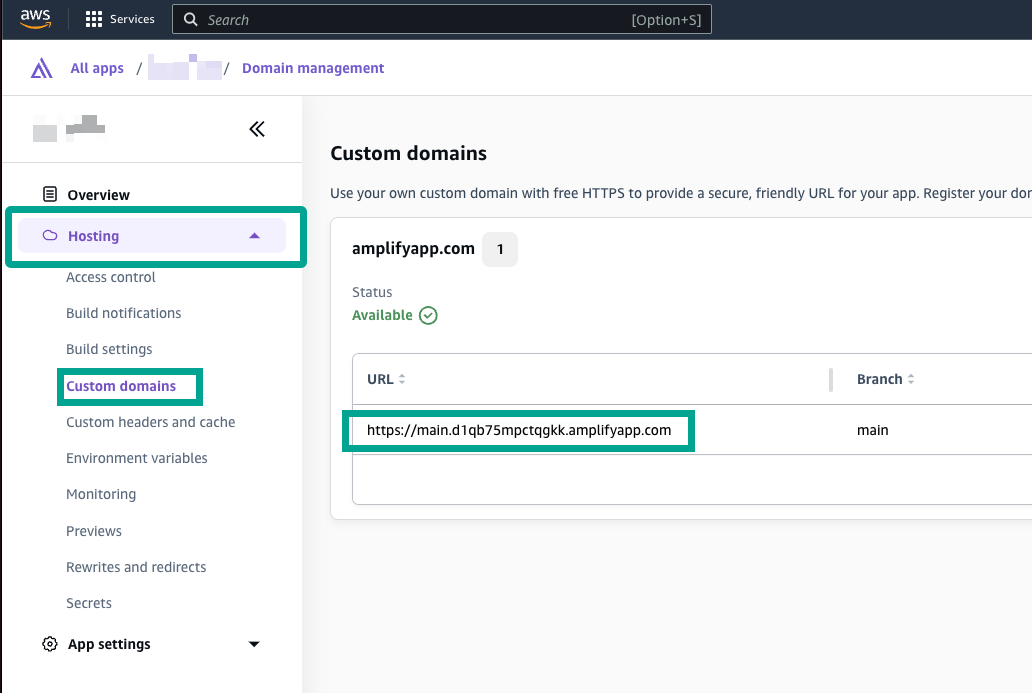
We need to obtain the domain that the app is being deployed on:
- Go to the main dashboard of your app in AWS Amplify.
- Click on
Hosting=>Custom domainsand copy the URL to your clipboard. See the screenshot below for an example.
Now go to Hosting => Environment variables. We need to configure two environment variables for NextAuth.js:
- Create environment variable
NEXTAUTH_URLand paste in the value we copied earlier from the Custom domains screen. - Create environment variable
NEXTAUTH_SECRET. This value is used by NextAuth.js to encrypt auth cookies. See the NextAuth.js docs for creating a strong secret. You can also set this to something like "changeme" and revisit this later on, prior to launching to production.
Redeploy
After setting the NEXTAUTH_URL and NEXTAUTH_SECRET environment variables, the app is now ready to be redeployed:
- Go to the dashboard of your app, and click on the
maindeployment. - Click the
Redeploy this versionbutton.- Note: If a build is currently running from the inital deployment, cancel the build, and then click
Redploy this version
- Note: If a build is currently running from the inital deployment, cancel the build, and then click
When the app finishes deployment, your Composable UI storefront is ready to use! Go back to the dashboard of your app, and click Visit Deployed URL.
Next steps
Visit the integrations guide to set up additional features like product filtering, product promotions, content orchestration, and payments.